
Learning trombone slide positions is one of the first and most important steps for every beginner. Unlike other instruments, the trombone uses a slide instead of valves, which means each note has a specific position you must learn and remember.
In this guide, you’ll learn all the trombone notes, the correct slide positions, and tips to help you play them accurately and confidently.
You’ll also find practical tips to help you remember positions, recognize patterns, and build muscle memory more efficiently. If you’re completely new to the instrument, you may also want to read the companion guide: How to Play a Trombone: Beginner Step-by-Step Guide, for a full introduction to getting started.
Let’s get started!
Disclaimer
This article contains Amazon Affiliate Links. What this means, is that, at no cost to you, if you click a link and follow through with a purchase, this site may earn a small commission.

Trombone Warmup Routine
Your trombone warm-up routine is something you will develop over time. As a beginner, you may not be ready to complete all six steps listed below—and that’s completely normal. Intermediate and advanced players can handle more, but every player builds their routine step by step.
As you practice these exercises consistently, you will strengthen your embouchure and improve your overall sound. Eventually, your warm-up will become a “memorized set”—a routine you know well and can adjust based on your needs and goals.
A warm-up is important for every practice session, whether it’s short or long. Before you begin, ask yourself:
“How long will my practice session be?”
If you only have 15 minutes, you don’t need a 20-minute warm-up. The key is to match your warm-up to the time you have so you can make the most of your practice.
If you’re not sure how to structure your full practice time, be sure to read: How to Practice Trombone: A Beginner Routine That Actually Works where you’ll learn how to build a complete practice routine that fits your schedule and helps you improve faster.
How Trombone Slide Positions Work
Unlike most instruments, the trombone does not use valves or keys to change notes. Instead, it uses a slide with seven main positions. Each position changes the length of the tubing, which lowers or raises the pitch.
However, slide positions alone don’t determine every note. Trombone players also use something called partials, also known as the harmonic series on the trombone.
The harmonic series is a group of notes that can be played in the same slide position just by changing your air speed and embouchure (how your lips vibrate).
For example, in 1st position, you can play multiple notes such as Bb, F, Bb, and D without moving the slide. These notes all belong to the same harmonic series.
Think of it this way:
- Slide position = where the note is played
- Harmonic series (partials) = which note you choose in that position
Understanding how slide positions and the harmonic series work together is the key to playing the correct notes on the trombone.
Below, is a Trombone Harmonic Series (Partials) Lip Slur Chart that will show six notes that can be played in each slide position. As you progress, use this chart to see how your range is improving. This is also a great lip slur exercise routine for the intermediate and advanced trombonist.
Trombone Harmonic Series Lip Slur Chart
Why Some Notes Have Multiple Positions
One of the most confusing things for beginners is discovering that some notes can be played in more than one slide position.
For example:
- The note Bb above the staff can be played in 1st position
- The same Bb can also be played in 5th position
These are called alternate positions.
Why does this happen?
Because of the way the harmonic series overlaps across different slide positions. As the slide extends, certain notes line up again in new positions.
Alternate positions are actually very useful. They can help you:
- Play faster passages more easily
- Improve slide movement efficiency
- Make certain transitions smoother
At the beginner level, it’s best to first learn the main positions, and then gradually explore alternate positions as your playing improves.
Beginner Mistakes with Slide Positions
When learning trombone slide positions, beginners often run into a few common mistakes. Being aware of these early can help you improve much faster.
1. Not Extending the Slide Far Enough
Many students play notes slightly sharp because they don’t extend the slide fully to the correct position. Remember that your wrist is the extender for the arm for 6th and 7th positions.
2. Overshooting the Position
Pushing the slide too far can cause notes to sound flat.
3. Guessing Instead of Listening
Your ear is just as important as your slide. Always listen carefully to your pitch.
4. Moving the Slide Too Slowly
Delayed slide movement can cause missed or unclear notes.
5. Not Using a Reference (Tuner or Piano)
Practicing without checking pitch can lead to bad habits.
Fixing these mistakes early will lead to better tone, accuracy, and confidence.
How to Practice Slide Positions
The best way to learn slide positions is through consistent, focused practice.
Here is a simple routine you can follow:
Step 1: Start in 1st Position
Play a comfortable note like the Bb above the staff and focus on a clear, steady sound.
Step 2: Moving Between Slide Positions
Practice moving from 1st to 2nd, then 2nd to 3rd, and so on. Go slowly and listen carefully.
Step 3: Use a Tuner
Check that each position is in tune. Small adjustments make a big difference.
Step 4: Say the Positions Out Loud
For example: “1st… 2nd… 3rd…”
This helps reinforce muscle memory.
Step 5: Practice Simple Scales
Trombone Scales With Slide Positions: Bb, F, and Eb connect positions in a musical way and build coordination.
Short, daily practice sessions (even 10–15 minutes) are more effective than long, inconsistent ones.
Need Help Mastering This Technique?
Book an online lesson with Rick Lawrence
ONLINE TROMBONE LESSONS – Learn Anywhere with a Private Trombone Teacher
Tips for Memorizing Slide Positions
Memorizing slide positions becomes much easier when you use the right strategies.
Look for Patterns
Many notes follow predictable patterns across positions. Recognizing these helps reduce memorization.
Use Repetition
Frequent, short practice sessions help build muscle memory faster than occasional long sessions.
Visualize the Slide
Picture where each position is before you play it.
Group Notes Together
Learn notes by position instead of individually.
Practice with a Chart
Refer to the trombone slide positions chart below while practicing reinforces learning.
Over time, your hands will remember the positions automatically.
Trombone Slide Position Chart
The trombone slide position chart below shows notes from low E to high Bb, along with their corresponding slide positions. Each measure includes the note name and the position where it is played.
In some measures, you’ll notice two note names listed for the same slide position—one written as a sharp (♯) and the other as a flat (♭). These are called enharmonic equivalents.
Enharmonic equivalents are notes that are written differently but sound exactly the same. For example, F♯ and G♭ are played in the the 5th position and produce the same pitch on the trombone.
Understanding enharmonic equivalents will help you read music more easily, especially as you begin playing in different keys.
Trombone Slide Position Chart
What Happens If You Miss a Position
Missing a slide position is something every trombone player experiences—especially at the beginning.
When you miss a position:
- The note will sound out of tune (sharp or flat)
- The tone may sound unclear or unstable
- It can affect your confidence while playing
The good news is that this is completely normal.
To fix it:
- Slow down your practice
- Focus on accurate slide placement
- Use a tuner to check your pitch
- Listen carefully and adjust
Developing a good ear is just as important as learning the positions themselves.
With time and practice, your accuracy will improve, and finding the correct position will feel natural.
Music Notation
Playing the trombone requires that you learn to read music notation. This notation deals with all the symbols that musicians read in order to produce the musical sounds. Below are a few basic terms you must learn in order to understand music notation.
Vocabulary
Staff – The set of five horizontal lines where music is written.
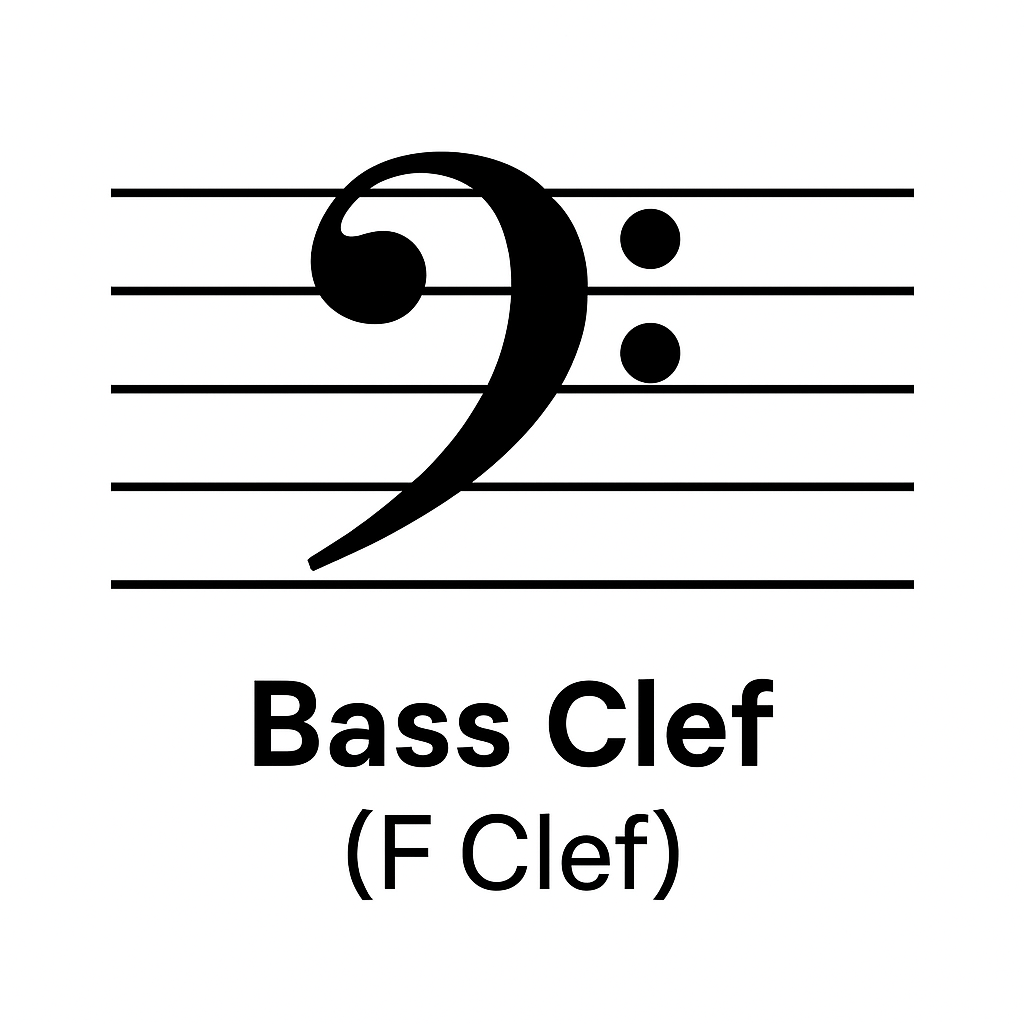
Bass Clef – The most common clef for trombone music (looks like a backwards “C” with two dots).
Measure – A section of the staff divided by vertical lines to organize beats.
Bar Lines – Vertical lines separating measures in written music.
Time Signature – Numbers at the beginning of the music that show how many beats are in each measure and what note gets the beat (example: 4/4, 3/4, 2/4).
Key Signature – Sharps or flats at the beginning of the staff showing which notes are altered throughout the piece.
Note – A symbol showing the pitch and duration of a sound.
Rest – A symbol indicating silence for a measured amount of time.
Sharp (♯) – Raises a note by one half step.
Flat (♭) – Lowers a note by one half step.
Natural (♮) – Cancels a sharp or flat.
Tempo – The speed of the music (how fast or slow to play).
Pitch – How high or low a note sounds.
Check out more glossary terms
Understanding the Trombone Slide System
The trombone’s slide length determines the pitch:
• Shorter slide position or extension = higher pitch
• Longer slide position or extension = lower pitch
Each of the seven standard positions changes the length of the air column, allowing the player to reach different notes within the instrument’s harmonic series.
A well-developed ear and steady embouchure are key to playing in tune, since there are no physical “stops” like on a piano or fretted instrument.
The Seven Trombone Slide Positions
Below is a chart showing the seven trombone slide positions and their most common notes. These are for a B♭ tenor trombone, the standard instrument for most students and ensembles.
Position |
Approximate Location |
Notes (Common Partials) |
|
1st Position |
Slide all the way in |
B♭ – F – B♭ |
|
2nd Position |
Slightly extended (1 1/2”) |
A – E – A |
|
3rd Position |
Just above the bell |
A♭ – E♭ – A♭ |
|
4th Position |
Close to even with the bell |
G – D – G |
|
5th Position |
A few inches beyond the bell |
G♭ – D♭ – G♭ |
|
6th Position |
Nearly full arm’s length |
F – C – F |
|
7th Position |
Fully extended |
E – B – E |
Along with these terms, learn How to Read Notes in Bass Clef: Beginner’s Guide

Trombone Slide Positions in Action
The exercises below are designed to help beginner trombone players develop accurate slide positions, good tone quality, and strong air support. Read the article: First 5 Notes for Trombone Beginners: Easy Step-by-Step Guide
Practice Guidelines
1. Play Slowly First
Start at a comfortable tempo. Accuracy is more important than speed. As you improve, you can gradually increase the tempo.
2. Use Steady Airflow
The trombone requires a constant stream of warm air. Imagine fogging a mirror with your breath while playing.
3. Move the Slide Quickly and Confidently
Avoid slow or hesitant slide motion. Move directly to each position with confidence to improve accuracy.
4. Memorize The Positions
While practicing, say the slide positions in your head (1st, 2nd, 3rd, etc.) to reinforce muscle memory.
5. Take Full Breaths
Always begin phrases with a relaxed, full breath to support a strong tone.
6. Repeat Each Exercise
Play each exercise 3–5 times before moving on. Repetition builds coordination and confidence.
Exercise Goals
#1: Learn basic slide positions
#2: Develop control between notes
#3: Improve position accuracy
#4: Build coordination and musical flow
Trombone Notes and Positions
Tips for Learning Trombone Slide Positions
Practice Smooth Slide Transitions
Avoid jerky movements — the slide should glide naturally from one position to another. Make sure that your right hand is holding the slide correctly.
Memorize by Feel and Sound
Over time, you’ll instinctively know where each note “sits” on the slide and what it sounds like.
Warm Up Daily
For the next two to three weeks, begin every practice session with this warmup exercise page to stabilize your embouchure and air support. Click the link below and print it out for daily use.
The Best Warm-Up Routine for Trombone Players
Playing in Tune on the Trombone (Intonation and Adjustment Strategies)
One of the most important skills for any trombone player is learning how to play in tune, also known as good intonation. Unlike instruments with fixed keys or valves, the trombone allows you to make small adjustments to every note using the slide. This is a powerful advantage—but it also means you must train your ear and slide control carefully.
Why Intonation Matters
Good intonation means that the notes you play match the correct pitch. When your intonation is accurate:
- Your sound blends well with other musicians
- Chords sound full and balanced
- Your playing sounds confident and professional
Poor intonation, even by a small amount, can make your sound feel unstable or out of place.
Why Slide Positions Are Not Exact
Although we learn seven slide positions, they are not fixed like frets on a guitar. In reality, each position is a general location, not an exact spot.
Why?
Because pitch can change based on:
- The note you are playing (partial)
- Your embouchure (lip tension)
- Air speed and support
- The tuning tendencies of the instrument
This means that every note may require a slight adjustment of the slide to be perfectly in tune.
Common Intonation Tendencies
As you begin to play more, you’ll notice that certain notes tend to be naturally sharp or flat.
For example:
- Some higher partials tend to be sharp
- Lower notes may feel flat if not supported with enough air
- Notes in extended positions may need fine adjustment
Learning these tendencies takes time, but your ear will improve with consistent practice.
How to Adjust Intonation on the Trombone
The trombone gives you a unique advantage—you can adjust pitch in real time.
Here’s how:
1. Use Small Slide Adjustments
Move the slide slightly forward or backward to bring the pitch into tune. Even small movements can make a big difference.
2. Listen Carefully
Your ear is your most important tool. Always listen to the pitch and make adjustments as you play.
3. Match Pitch with a Reference
Play along with:
- A tuner
- A piano
- A drone tone
Try to match the pitch exactly.
4. Adjust with Air and Embouchure
Sometimes pitch can be corrected by:
- Increasing air support
- Relaxing or firming your embouchure
However, avoid forcing notes—use the slide as your primary adjustment tool.
Practice Strategies for Better Intonation
Improving intonation requires consistent, focused practice.
Use a Tuner Daily
If you don’t own a Tuner/metronome, you need to get one. Play long tones and check each note. Adjust the slide until the pitch is centered.
Practice Long Tones
Hold each note and focus on producing a steady, in-tune sound.
Play with Drone Notes
A drone (a constant pitch) helps you hear when you are in or out of tune.
Practice Scales Slowly
Move carefully between notes and listen for accurate pitch.
Record Yourself
Listening back can reveal intonation issues you may not notice while playing.
Playing in Tune with Others
When playing in a band or ensemble, intonation becomes even more important.
To stay in tune:
- Listen more than you play
- Match the pitch of the group
- Adjust your slide constantly
- Be flexible—tuning can change depending on the group
Great ensemble players are always adjusting in real time.
Key Takeaway
Playing in tune on the trombone is a combination of:
- Knowing your slide positions
- Understanding pitch tendencies
- Developing a strong ear
- Making constant small adjustments
This skill takes time to develop, but it is one of the most important steps toward sounding like a confident and expressive trombone player.
Common Mistakes to Avoid
Overextending or Underextending the Slide: Each trombone is slightly different, so learn your instrument’s unique “true” positions.
- Neglecting Ear Training: Always match pitch by listening carefully.
- Using Excessive Mouthpiece Pressure: Keep your embouchure relaxed for flexibility and endurance.
- Skipping Slow Practice: Fast playing hides poor intonation — slow, focused practice builds control.
Recommended Beginner Trombone Equipment
A few essential tools make learning much easier. Click on the links below for these products on Amazon:
- Maintenance Kit
- Trombone Practice Mute
- Trombone Stand
- Music stand
- Arban’s Complete Method for Trombone
- Rubank Elementary Method for Trombone
Frequently Asked Questions About Trombone Slide Positions
Q: How many slide positions does a trombone have?
A: A standard tenor trombone has 7 slide positions.
Q: Is trombone harder to learn than trumpet?
A: Trombone requires more accuracy because there are no valves — but many beginners learn it successfully.
Q: How long does it take to learn slide positions?
A: Most beginners memorize basic positions within 2–4 weeks with daily practice.
Q: Why do some notes have two positions?
A: Alternate positions exist to make music easier and smoother to play.
Q: What is the hardest slide position?
A: 6th and 7th positions are hardest because the slide is far from the body.
Final Thoughts: Mastering Trombone Slide Positions
Mastering trombone notes and slide positions is the key to confident, accurate playing. With regular practice, patience, and a well-trained ear, any player can achieve smooth slide control and precise intonation.
Want to Learn Trombone Faster?
If you or your child are just starting trombone, the fastest way to improve is with guided instruction.
Private lessons help students:
- Learn correct slide positions quickly
- Develop a strong tone
- Avoid bad habits
- Gain confidence
ONLINE TROMBONE LESSONS – Learn Anywhere with a Private Trombone Teacher
About the Author
Rick Lawrence is a retired music educator, conductor, professional trombonist, and private instructor with more than 40 years of playing and teaching experience. He has performed with orchestras, jazz ensembles, brass bands, and pit orchestras, and studied with John Coffey of the Boston Symphony Orchestra, Donald Knaub of the University of Texas, and Edward J. Madden – trombonist, composer and arranger.
Through The Trombone Mentor, Rick provides online trombone lessons and educational resources for beginner, intermediate, and advanced trombonists.